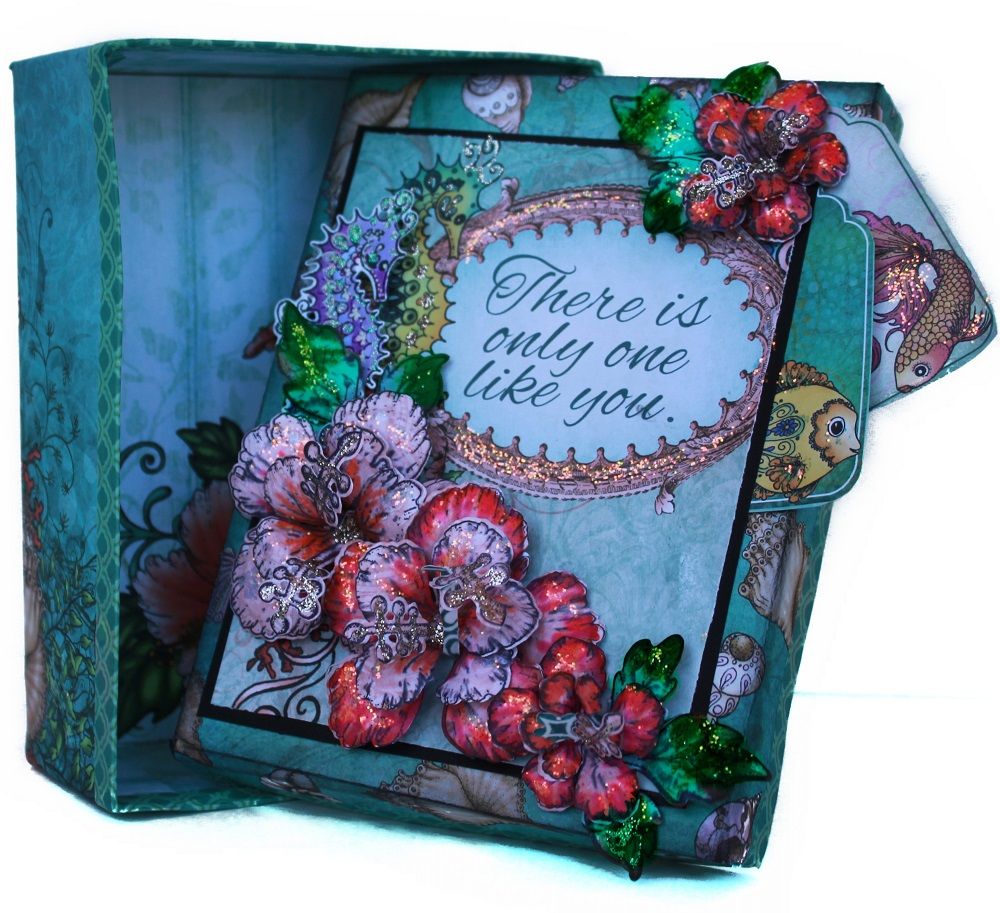
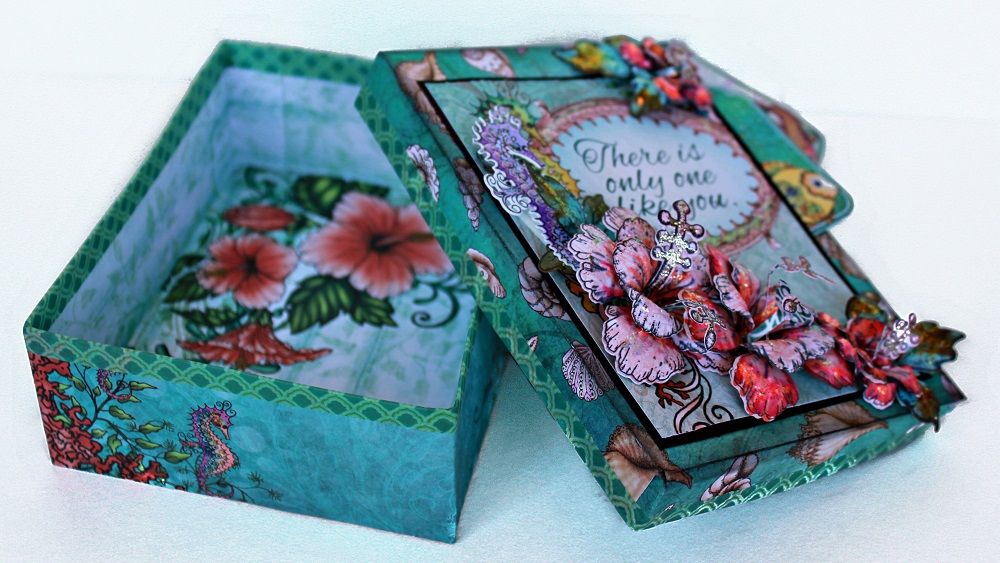
Hello! It has been a whirlwind on my end, how are you all doing? I spent the last 2 weeks in California visiting family and it drained me! But nothing makes me feel better than losing myself in the beautiful papers, stamps and dies from Heartfelt Creations. This month we are showcasing the Under the Sea Collection. These papers are colorful, fun and full of fish, shells, jellyfish images and more. I created this box from scratch, but you can use any box you have laying around, just cover it with beautiful papers and embellish. I hope to inspire you to create... and when you have the chance
Check out the amazing DT inspirations at the Blog today


Check out the amazing DT inspirations at the Blog today
Products Used:

Tropical Hibiscus Craft Die HCD1-796
Tropical Hibiscus Cling Stamps HCPC-3736
Under The Sea Craft Dies HCD1-799
Under The Sea Craft Cling Stamps HCPC-3739
Designer Paper Collection

Other products used, paper box, Stickles, Washi Tape, Alcohol Markers in colors of your choice, I used lavender and gold for the seahorse and Mauve for the flowers, black cardstock, Memento dye ink pad in Tuxedo Black. (used for all the stamped images)

Hello, this was a very fun project to create. I used a hand made box but you can use any paper mache' box you have.
First, I covered the box inside and out using the Under the Sea Designer Paper Collection and used washi tape on the box and the lid to cover the raw edges and give the box a finished looked.

Second I stampped 2 sets the beautiful Hibiscus flowers using the cling stamps. Colored the images in using alcohol markers before using the Hibiscus dies. Once the flowers were die cut, I layered them and finished them with gold and diamond Stickles. At this time, I also stamped, colored and die cut the cute Sea Horse. I set this aside until the box was ready to embellish.

On the lid, I used an image from the Under the Sea paper collection.  The one I chose reads, "There is only one like you." I cut it to fit the box lid and layered it on black cardstock.

Once everything was ready, I glued the flowers around the base of the lid making sure I didn't cover too much of the image. To finish the look, I fussy cut a couple of the small tags from the designer paper collection and tucked them under the layered image on the right hand corner. At this time, the cute little Sea Horse was tucked beneath the flowers right over the bigger Sea Horse pre-printed image, to give it a 3d effect. Once the box was done, the entire image and flowers were made sparkly with Stickles. (The Stickles did not photograph really well, but the box sparkles beautifully.) Have fun creating!


I hope you have a chance to go and visit the rest of the talented ladies in this DT. Their creations are amazing...
Thank you all for stopping by and as always....


This is ABSOLUTELY beautiful! Love this!
ReplyDeleteHi kiddo! thanks!! love you..
DeleteFab ,love this so much x
ReplyDeleteHello Martine!! thanks so much for such a sweet comment!!!
Deletehugs
Elsa
A gorgeous box filled with more gorgeous!
ReplyDeleteHi!!! appreciate your comment! thanks for visiting... checking everyone's blog now...
Deletehugs
Elsa
Amiga it's beautiful....
ReplyDeleteThis is just beautiful. I love the colors.
ReplyDeletehi twinie!! Thanks!!!
Deletehugs
Elsa
Elsa, this is beautiful...the perfect box for gifting or storing treasures!
ReplyDeleteI love your amazing gift box! How gorgeous!
ReplyDeleteHugs, Marie
Stunning! hugsxx
ReplyDelete