Wednesday, August 31, 2016

How about 1 more Christmas card?

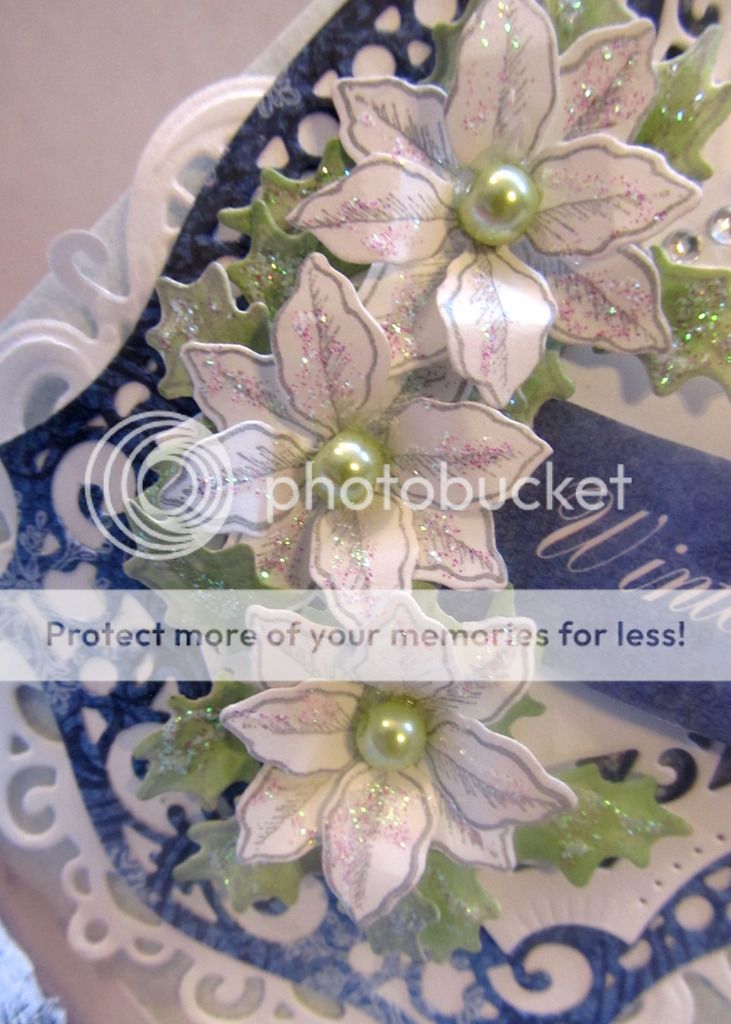
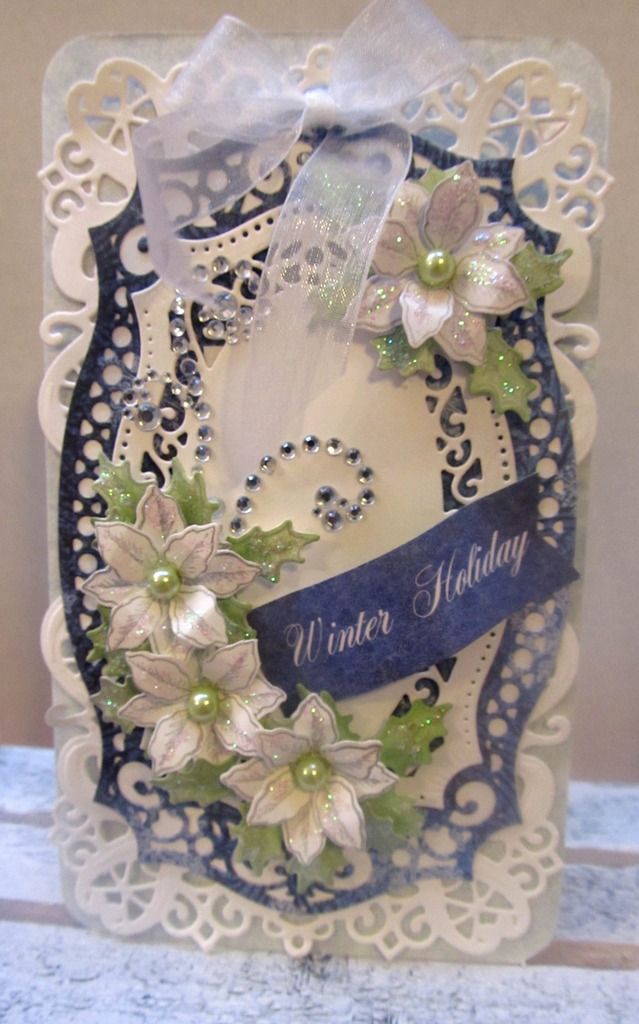
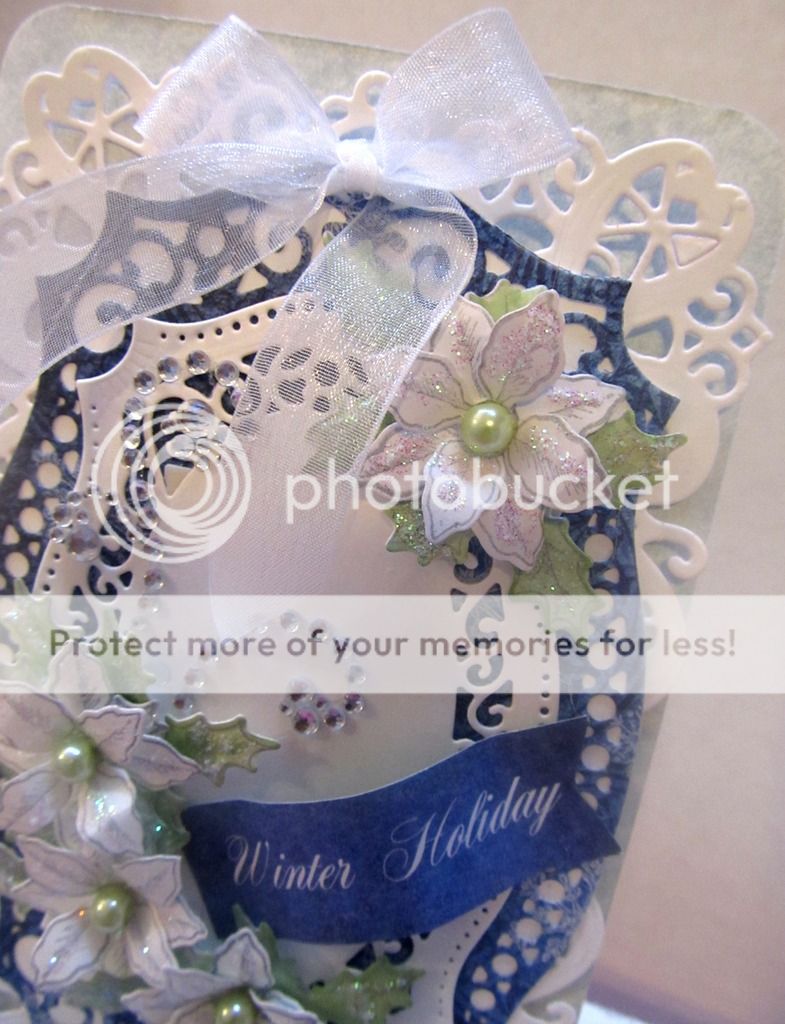
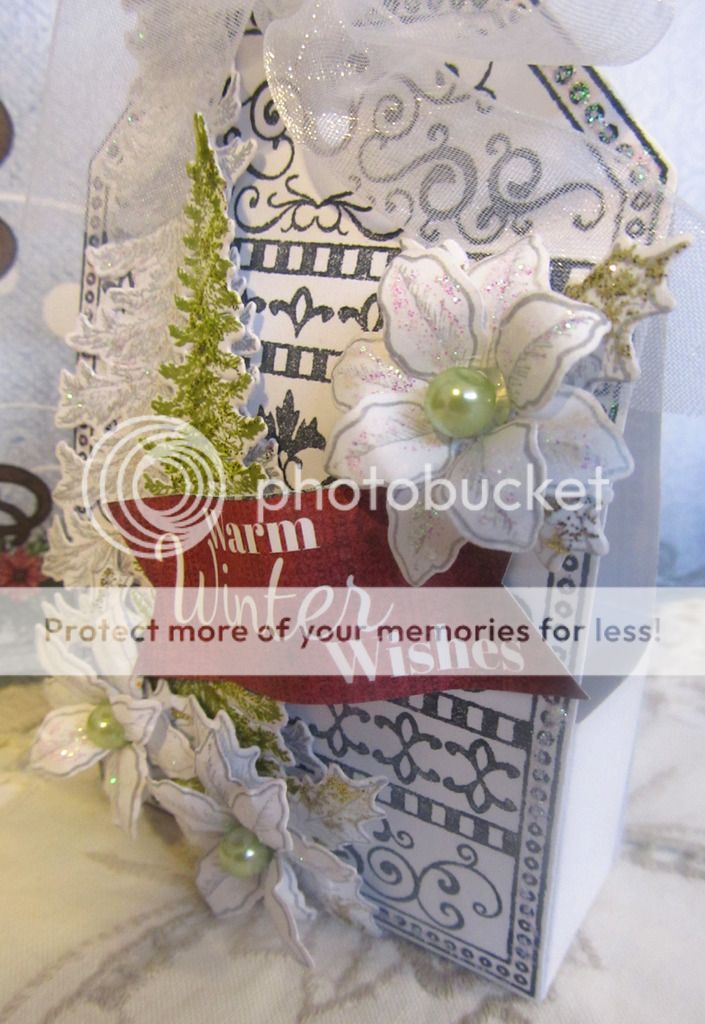
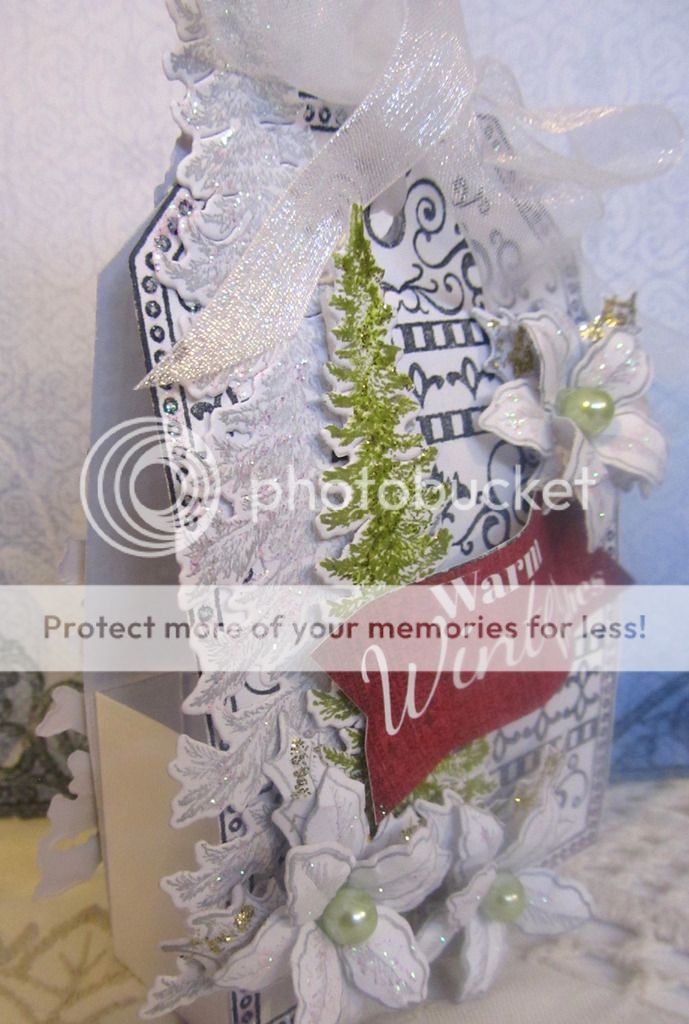
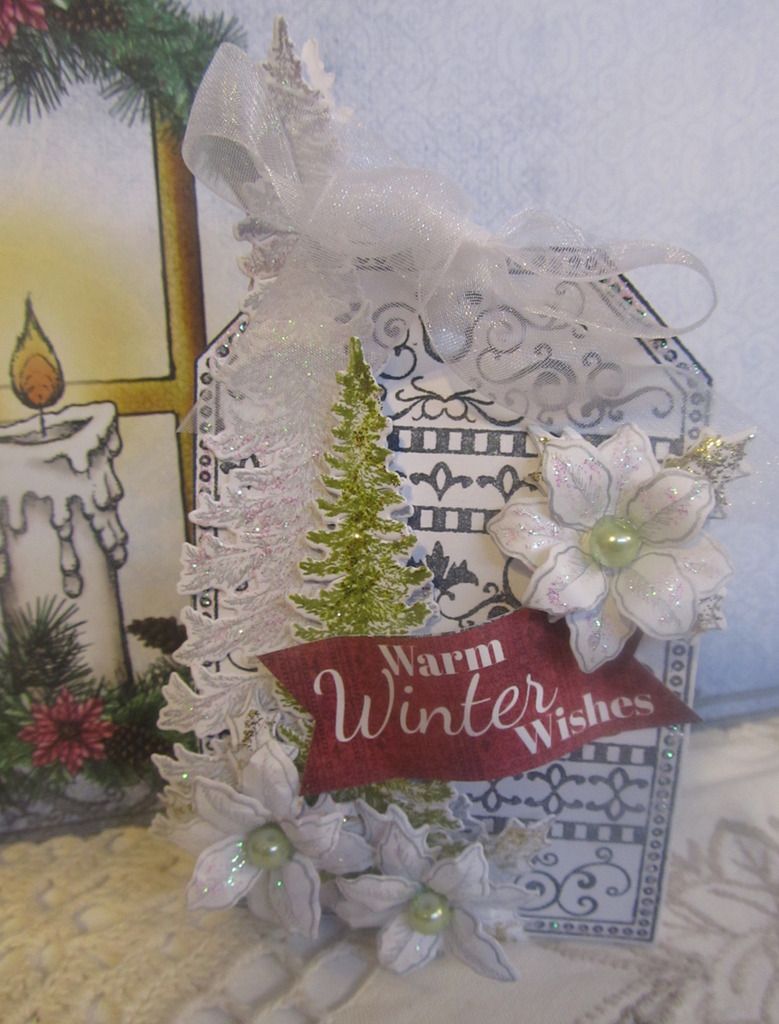
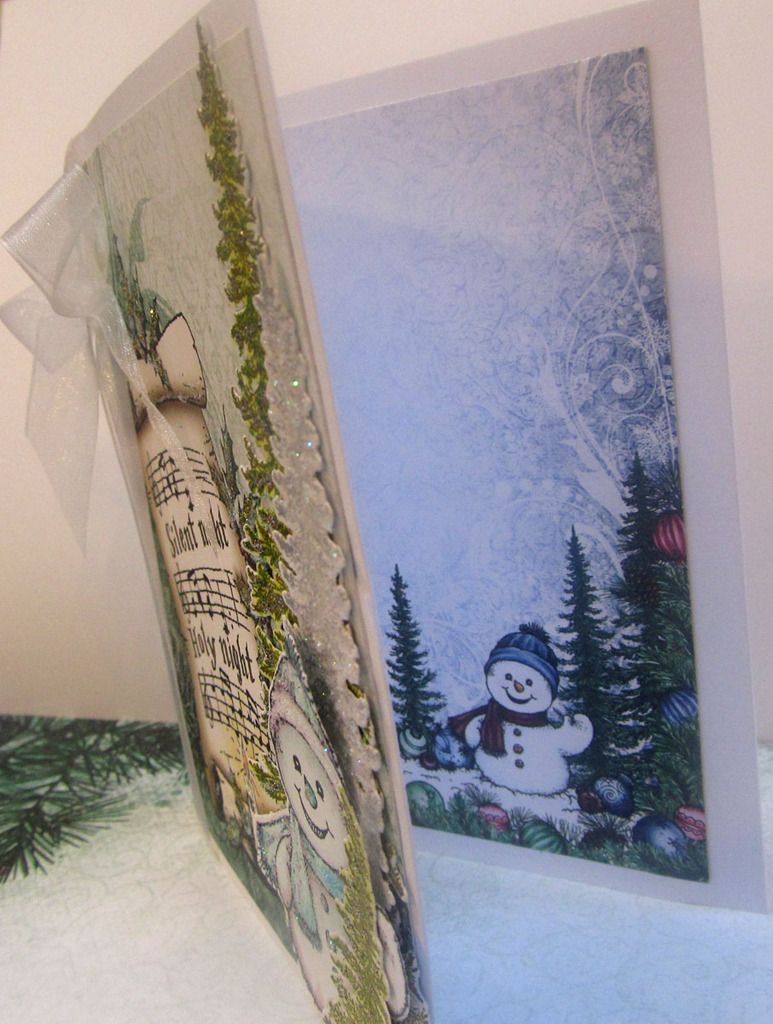
Ok...so one more! just one more Christmas card...for now. lol  This card as the one before I made using the Spellbinder labels 25.  Love these dies, I think they are sooo darn pretty!!  Anyway...used the same color combo as last week, but the orientation is different and I used an additional die layers plus the TREES! no tress last week... these trees are so fun to work with...I know I keep saying that but they are. I had lost my mojo there for a while, but having papers, stamps and dies in a theme, make creating easy.  I am also a new sequin addict! I added them to the snowflake centers. Tell me what you think....See the sequins?  In person, this card is really sparkly...

 photo Merry Christmas card 1_zpsw0j4rgkj.jpg

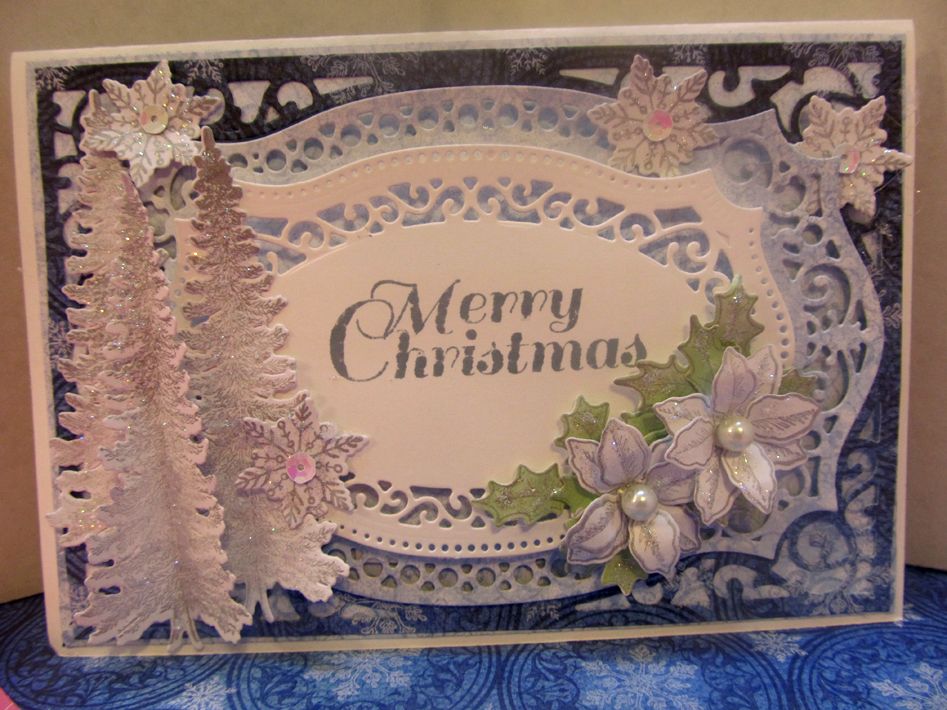
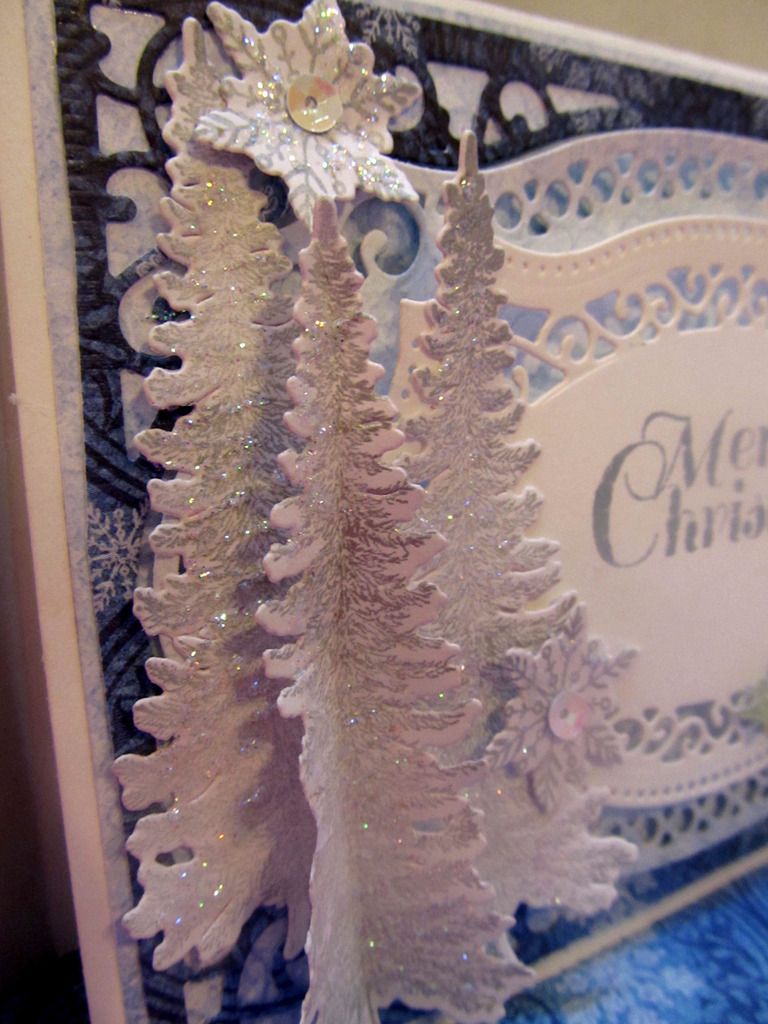
The tree you see there up front, i folded in half and glued it on the crease so there is a lot of dimension on this card.

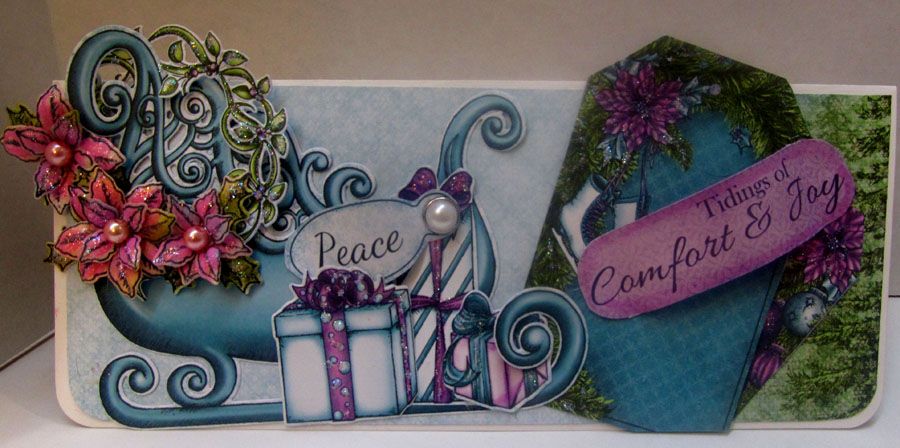
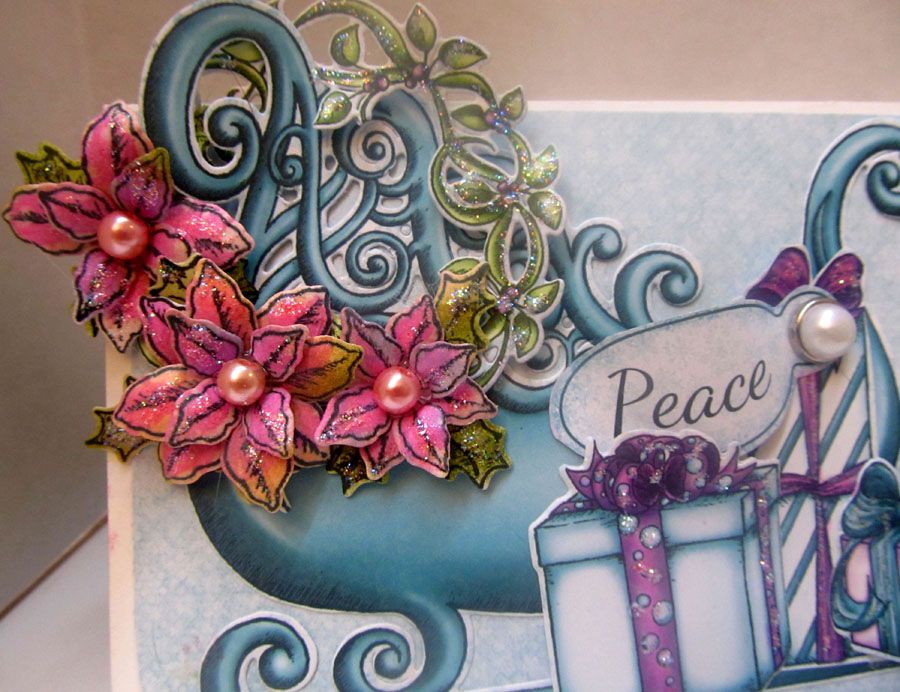
Here are the instructions:
HCD1-7106 Die [for Poinsettia]
HCPC-3747 Cling Stamps Celebrate the Season
HCPC-3749 Cling Stamps Snow Kissed Spruce
HCD1-7107 Die
HCD1-7109 Die
HCPC-3748 Cling Stamp gift wrapped presents
Designer paper "Snow Kissed"

Spellbinders Nestabilities "Majestic Labels twenty-five", Stickles "Star Dust", glass beads, Color Box stamp pad "Silver", white card stock, Copic marker G21 Lime Green, Iridescent  sequins,

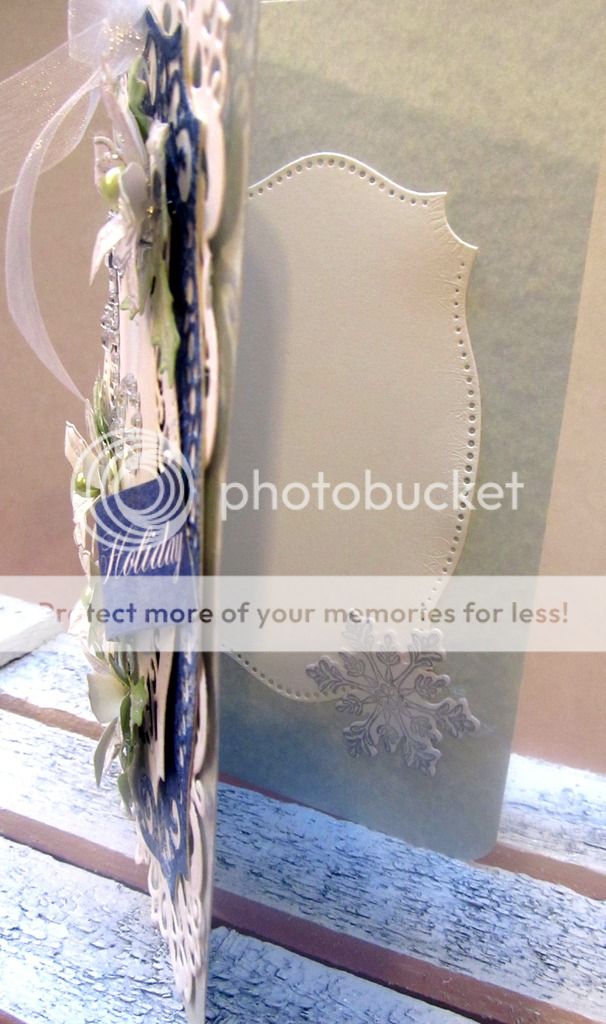
Cut a piece of white card stock 6 3/4 x 9 and fold it in half to make the card base.

 photo Merry Christmas card 2_zpsz1vjxhth.jpgCut one set of each of the decorative layers from the Spellbinders dies.
Stamp Merry Christmas on one of the die cut pieces.
Stamp 3 of the medium spruce trees, enough poinsettias to make 2 flowers with leafs, and 4 of the small snowflakes with the Silver stamp pad. Stickles the trees and snowflakes.

Put the flower together, color the leafs with the lime green Copic marker, add the glass beads and stickles.
Layer all the die cut pieces on the card base.
Arrange the flowers on one end of the card and the trees on the other.
Glue snowflakes all around the card and add the sequins in the center to make them sparkle.

Stamp a sentiment on the inside of the card and add a few snowflakes on the each corner.

you can get all these awesome products at  :  Heartfelt Creations < click that... go have fun shopping!

Thanks you so much for stopping by...
and as always...


Wednesday, August 24, 2016

Heartfelt Winter Holidays Card

Hi friends!!  Christmas is still going hard with the cards here in the justafew home! This time I am really liking the "Blue."  I have made this card in different shades of blue and white... the mini poinsettias are just so much fun to make and they really make all the cards look so nice, they make a great addition and fill in any open spaces.  The inside of the flowers are glass beads... I am really liking this look...what do you guys think?

 photo Winter Card 3_zps2emc7tj4.jpg

Here are the instructions...
Products Used:
HCD1-7106 Die [for Poinsettia]
HCD1-743 Raindrops on Roses Die
HCPC-3747 Cling Stamps Celebrate the Season
Designer paper "Snow Kissed"

 photo Winter Card 1_zpsza5mdogz.jpgSpellbinders Nestabilities "Majestic Labels twenty-five", Stickles "Star Dust", glass beads, ColorBox stamp pad "Silver", Recollections Bling, Sheer ribbon, light blue and white card stock, Copic marker G21 Lime Green.

Cut a piece of light blue card stock 8x7 and fold it in half to make the card base.

Die cut 2 of the half shaped lacy, romantic accent from the Raindrops on Roses Die from the white card stock
and 2 of the nested shapes from the Spellbinders dies. Cut the bigger from the designer paper, I used a piece of dark blue so it would stand out and I cut the smaller of the two from white card stock. 

Layer this pieces over the card base. 

Stamp with the silver stamp pad enough Poinsettias to make 4 sets of flowers and leafs.
Color the leafs withthe Lime Green copic marker and die cut them. 
Put them together, stickle them and set them aside to dry.


 photo Winter Card Inside_zpsankolvkc.jpgDie cut one of the smaller solid pieces from the Spellbinders die set and use it on the inside of the card and stamp or hand write your sentiment.
Now, layer the flowers on the card, and add the bling.

Hand cut one of the pre printed sentiments form the paper collection and center it on the card.
 photo Winter Card 2_zpspm5qjftb.jpg 

Adhere the sheer ribbon bow on the top of card...and you're done.

Thanks so much for visiting...and as always...

Wednesday, August 17, 2016

It's Wednesday....Heartfelt Winter Wishes Box

Hello! Things are moving right along here, after making so many Christmas items, I'm starting to thinks it's time to start purchasing gifts!! lol kinda pushed summer along huh?  This time, I made a cute little box that was so easy to make you guys are gonna love it.  You can make this in minutes and it would be so ideal to hand on the tree, fill with with some Hershey's kisses or drop a gift card in it. Let me show you so pictures... I will also have a video for this project...


 photo 2 Winter Wishes box_zpsrbtzuwup.jpg

Products used:
Snow Kissed paper Collection
HCD1-7106 Die
HCPC-3747 Celebrate the season Cling Stamp
HCPC-3751 Snow Kissed Flakes and Tags
HCD1-7018 Die
HCPC-3749 Snow Kisses Spruce Cling Stamp
HCD1-7107 Die
HCD1-7109 Die [Box]

Other products used: Color Box Pigment Stamp pad "silver", Tim Holtz "Peeled Paint", Sheer Ribon 22". Stickles "Gold and Crystal" 3 glass beads
White card stock, Memento Tuxedo dye.

 photo 3 Winter Wishes box_zpsqeajp86p.jpg


Cut the inside box using the HCD1-709 die, score it and put it together.
Stamp and die cut two of the tags and adhere one to each side of the box. I left mine black and white and later added some Stickles to the edges.


Stamp enough Poinsettias to make 3 flowers, using the Silver stamp pad, and then die cut them. Put the flowers together, Stickles them and set aside to dry.
Stamp 2 of the big Spruce trees with the Silver stamp pad and 2 smaller trees with distress ink pad, "Peeled Paint" and die cut all four.


Cut one of sentiments from the paper collection.

Now, adhere the trees, the sentiment and the flowers to the front of the box.  Use the sheer ribbon to tie a bow at the top of the tags and Stickles the trees.


 photo 4 Winter Wishes box_zpsjxatfni9.jpg

You're done, great boxes to put candy or a gift card.
Enjoy!


As always...Thanks for visiting and


Wednesday, August 10, 2016

Heartfelt Wednesday... a Silent Night Card

hello! looks like Christmas continues with the Heartfelt design papers...and so, I am continuing to make Christmas cards.  The next four weeks, you will see a couple of frolicking frosty and lots of spruce trees!!  These papers are beautiful, I had my Brandon -grandbaby- in the room with me while I was making this card and he loved the snow man. He must have stamped and cut like 20 of them, he just thought it was so much fun!!  anyway... here is my project for this week, let me know what you think...

 photo Silent Night Card 1_zpsm2sztsbz.jpg

Here are the Products used:
Snow Kissed paper Collection
HCPC-3750 Frolicking Frosty Cling Stamp
HCPC-3749 Snow Kissed Spruce Cling Stamp
HCD1-7107 Die [Spruce and Frosty]

Other products used: Color Box Pigment Stamp pad "silver", Tim Holtz "Peeled Paint", Sheer Riboon 22". Stickles "Gold and Crystal" Copic marker BG10 "Cool Shadow"
White card stock

 photo Silent Night Card 2_zpsicowlhon.jpgCut the white card stock 10 1/2" x 5 1/2" and fold in half, this makes your card base.  From the paper collection I cut the card background. I chose the corner
that read "Silent night Holy night".

Stamp the trees with the Silver and Peeled paint and die cut them.  Stickle them and set them aside to dry.
Stamp the cute little Frosty and color it with the Copic marker mentioned above and die cut it.

Layer the trees starting with the tallest on the back then the snowman and in front of the Frost, adhere the smallest of the trees.

Wrap the ribbon around the inside of the front of the card and tie a bow on the uppper part of the card.

Done...simple card made easy...Have fun creating!


I used the designer paper for the inside of the card... leaving some blank space for a hand written sentiment.

 photo Silent Night Card Inside_zpsyz1ra0bc.jpg


 photo Silent Night Card3_zpszslcb75w.jpg

Hope you enjoy your crafty time...
.thanks for stopping by and a always...


Wednesday, August 3, 2016

Celebrate the Season...continues.

Hi!!! So Christmas continues... just can't get enough of these papers and dies!!  For my final project using this awesome paper collection "Celebrate the Season." from Heartfelt Creations
I made a long card, this was by far the easiest card to create...
Have you guys started your Christmas cards yet???  hope this inspires you to create...


 photo SleightCard1_zpsbyc5qgyh.jpg

see I told you it was long... It would be so easy to add a gift card on the inside of this card, it just feel like a money card,,, my girls would love a couple $100 bills within this card! lol
This is what was used to make this card...
Products Used:
HCPC-3747 Cling Stamp [wreath and poinsettia]
HCD1-7106 Die Set
HCPC-7106 Die Set
HCPC-3745 Ornate Sleigh Cling Stamp  
HCPC-3748 Gift Wrapped Present die set
Celebrate the Season designer paper collection


Other Products: Sickles, white card stock, Glass Beads, Tim Holtz distress inks in Spun Sugar and Forest Green Moss, pearl brad

Cut a piece of white card stock 8 x 7 and fold it in half long ways. This makes the card base.

Stamp, color and die cute the poinsettias and the wreath.  I used the distress inks.  I made 3 flowers for this project, added glass beads for the centers 
and arranged them around the wreath.  Added Stickles, the leaves and set it aside to dry.
Using the sleigh die-- cut the pre-printed image from the paper collection, also die cut 3 of the presents and two of the tags, [also from the paper collection]
 photo SleightCard2_zpsiiftikux.jpgFrom the paper collection 
I cut --[7 3/4" x 6 3/4"] 
and used one on the inside of the card and one on the front of the card. Stamp-- "Merry Christmas" to the inside of the card. 

 Over this, layer the sleigh, and attach the wreath on the upper left hand corner of the sleigh, and on the bottom of the sleigh attach the 3 gifts. 

Add one of the sentiment tags to the tallest of the gift images using the pearl brad. 


 Adhere the tags, layering them one over the other and then add the sentiment to the opposite side of the card. Stickle everything you want shiny...and you're done!


Thanks so much for stopping by and as always...