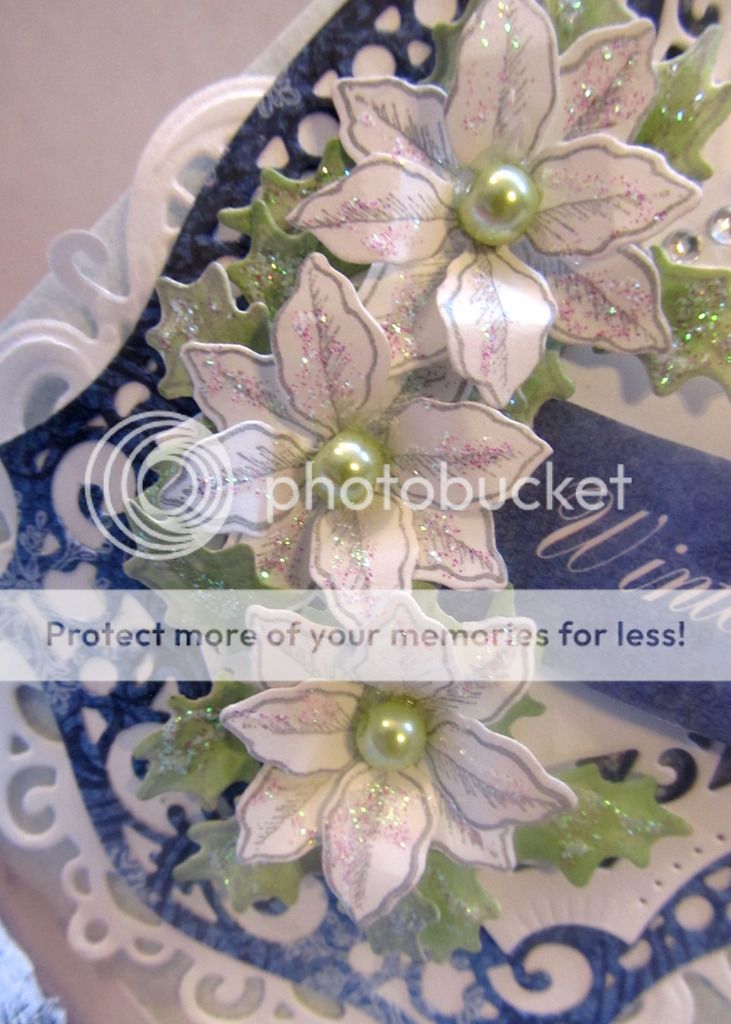
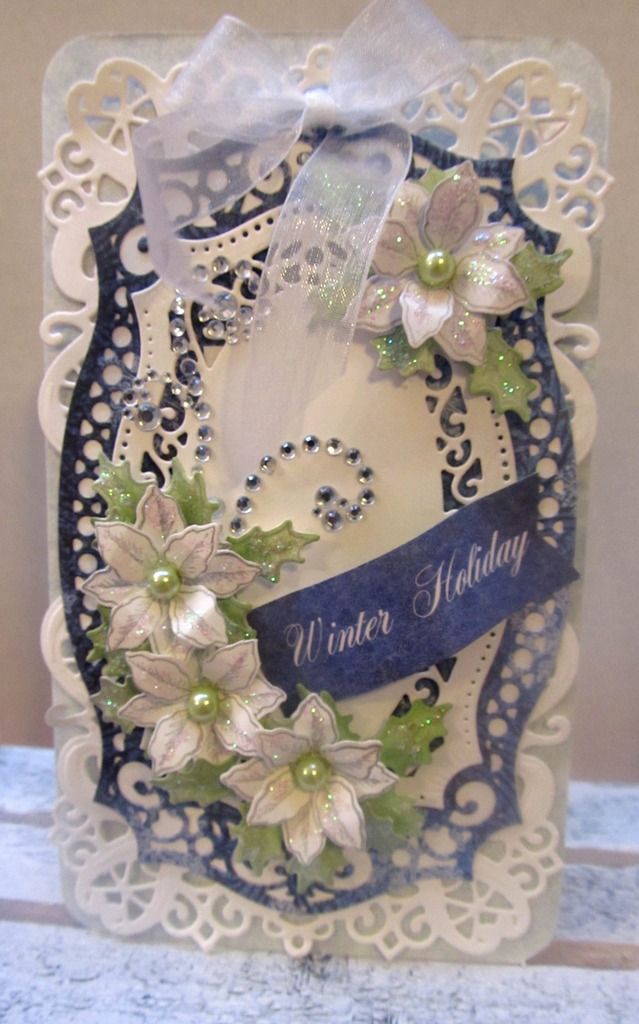
Hi friends!! Christmas is still going hard with the cards here in the justafew home! This time I am really liking the "Blue." I have made this card in different shades of blue and white... the mini poinsettias are just so much fun to make and they really make all the cards look so nice, they make a great addition and fill in any open spaces. The inside of the flowers are glass beads... I am really liking this look...what do you guys think?
Here are the instructions...
Products Used:
HCD1-7106 Die [for Poinsettia]
HCD1-743 Raindrops on Roses Die
HCPC-3747 Cling Stamps Celebrate the Season
Designer paper "Snow Kissed"
 Spellbinders Nestabilities "Majestic Labels twenty-five", Stickles "Star Dust", glass beads, ColorBox stamp pad "Silver", Recollections Bling, Sheer ribbon, light blue and white card stock, Copic marker G21 Lime Green.
Cut a piece of light blue card stock 8x7 and fold it in half to make the card base.
Die cut 2 of the half shaped lacy, romantic accent from the Raindrops on Roses Die from the white card stock
and 2 of the nested shapes from the Spellbinders dies. Cut the bigger from the designer paper, I used a piece of dark blue so it would stand out and I cut the smaller of the two from white card stock.
Layer this pieces over the card base.
Stamp with the silver stamp pad enough Poinsettias to make 4 sets of flowers and leafs.
Color the leafs withthe Lime Green copic marker and die cut them.
Put them together, stickle them and set them aside to dry.
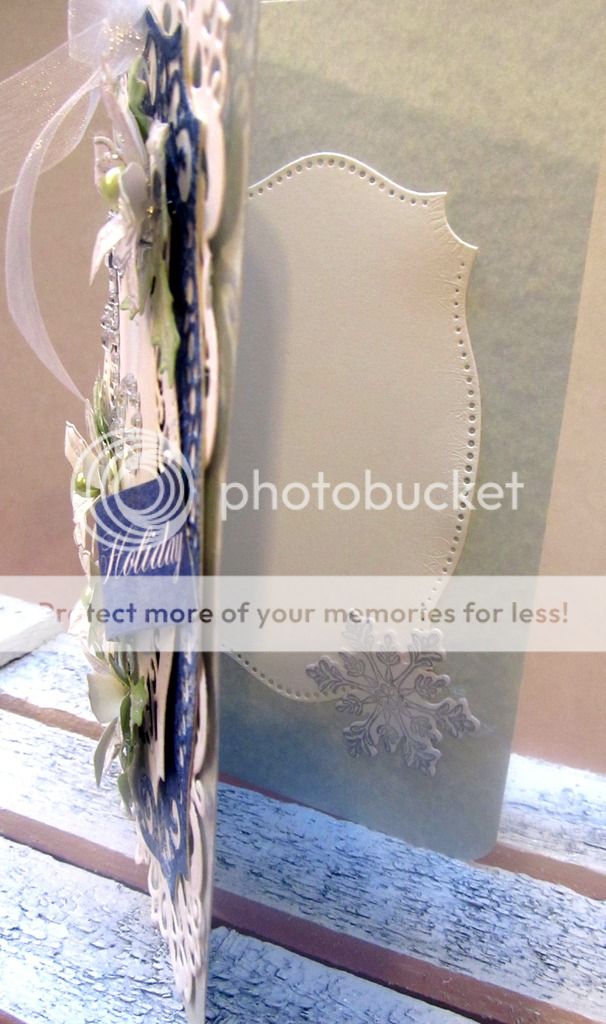 Die cut one of the smaller solid pieces from the Spellbinders die set and use it on the inside of the card and stamp or hand write your sentiment.
Now, layer the flowers on the card, and add the bling.
Hand cut one of the pre printed sentiments form the paper collection and center it on the card.
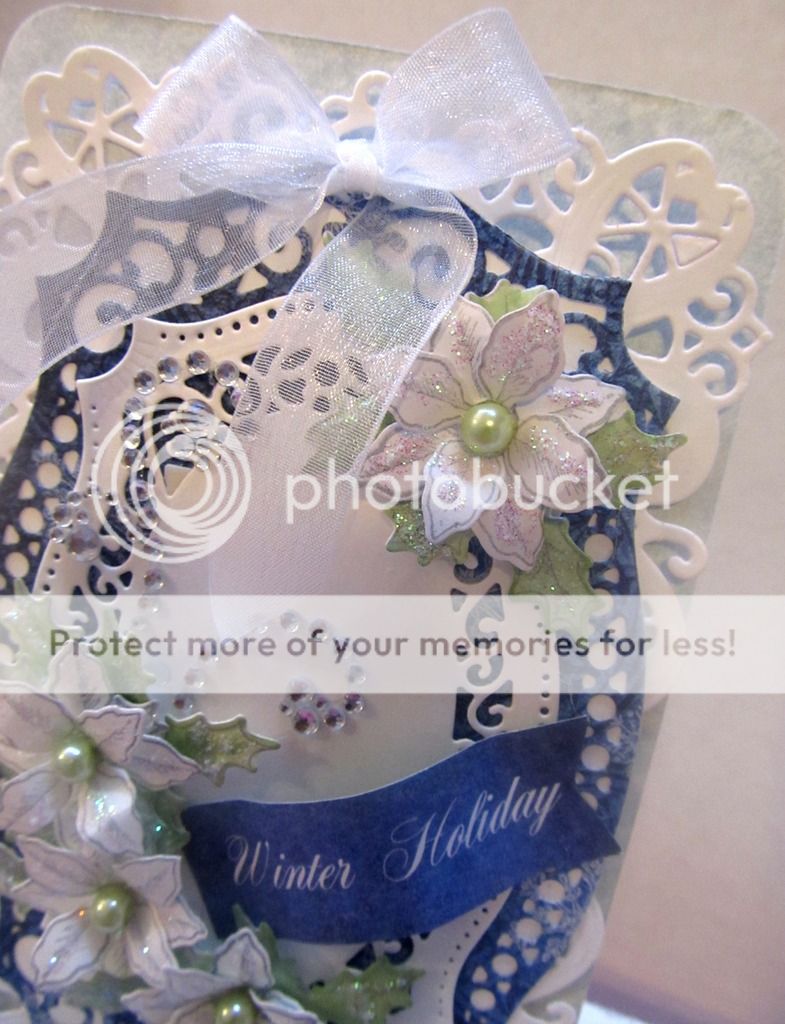
Adhere the sheer ribbon bow on the top of card...and you're done.
Thanks so much for visiting...and as always...

This is gorgeous!
ReplyDeleteGorgeous as always!!!!
ReplyDelete