Happy Heartfelt Wednesday! This Sunday will be Father's day, do you have anything planned?? I plan to have him relax and cook him a full hearty meal... ya' know steak, potatoes and more lol' or maybe seafood??? But before I get to ahead of myself lets take a look at my card for today. Heartfelt creations has the prettiest papers, they are vibrant and the mini layouts help you create instant cards.
I've liked all the papers thus far, but I ADORE these, they are pink and soft and so easy to create with.
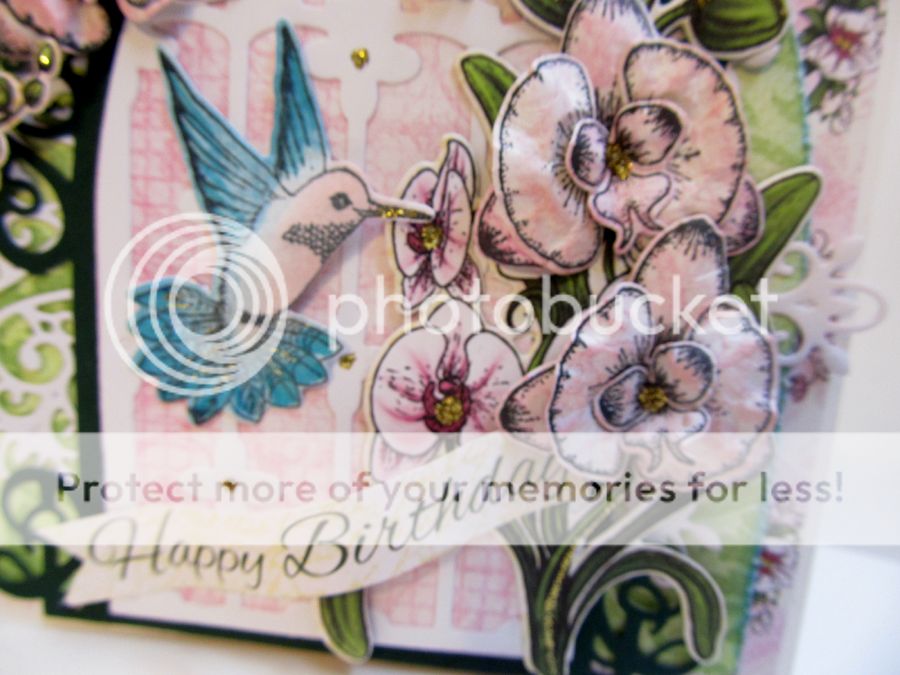
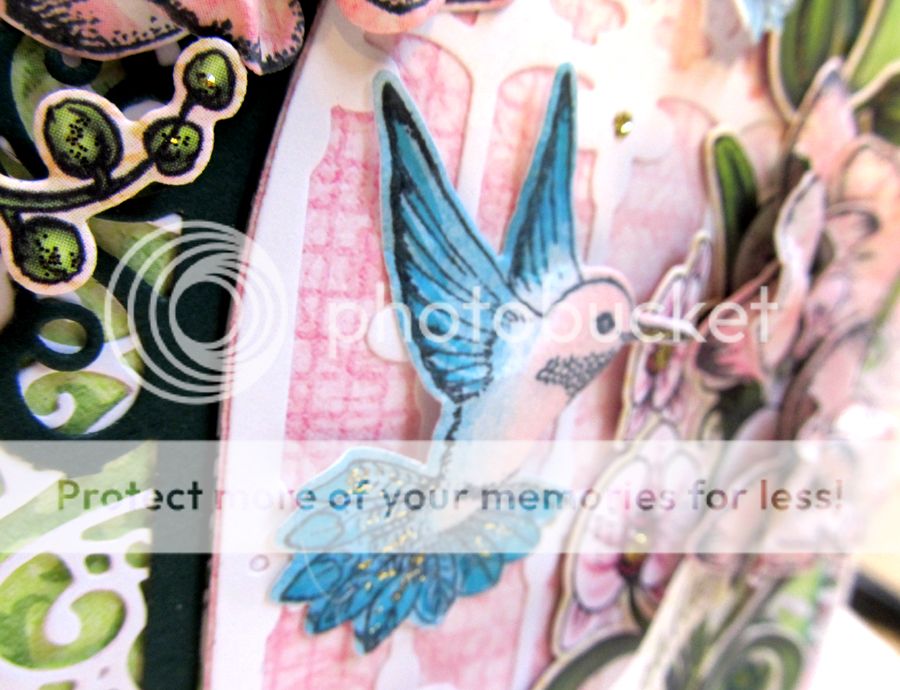
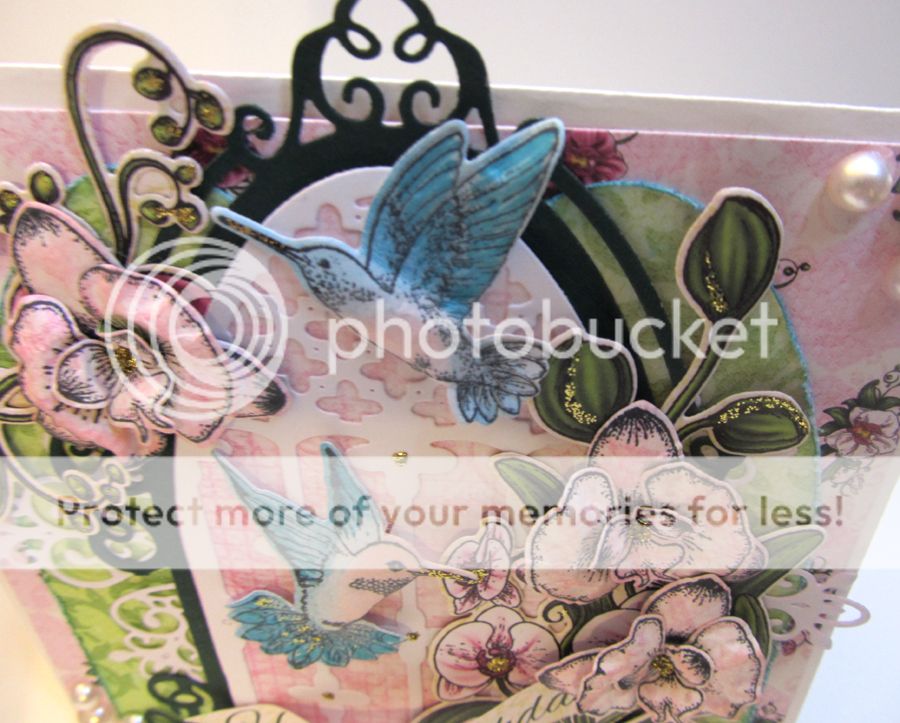
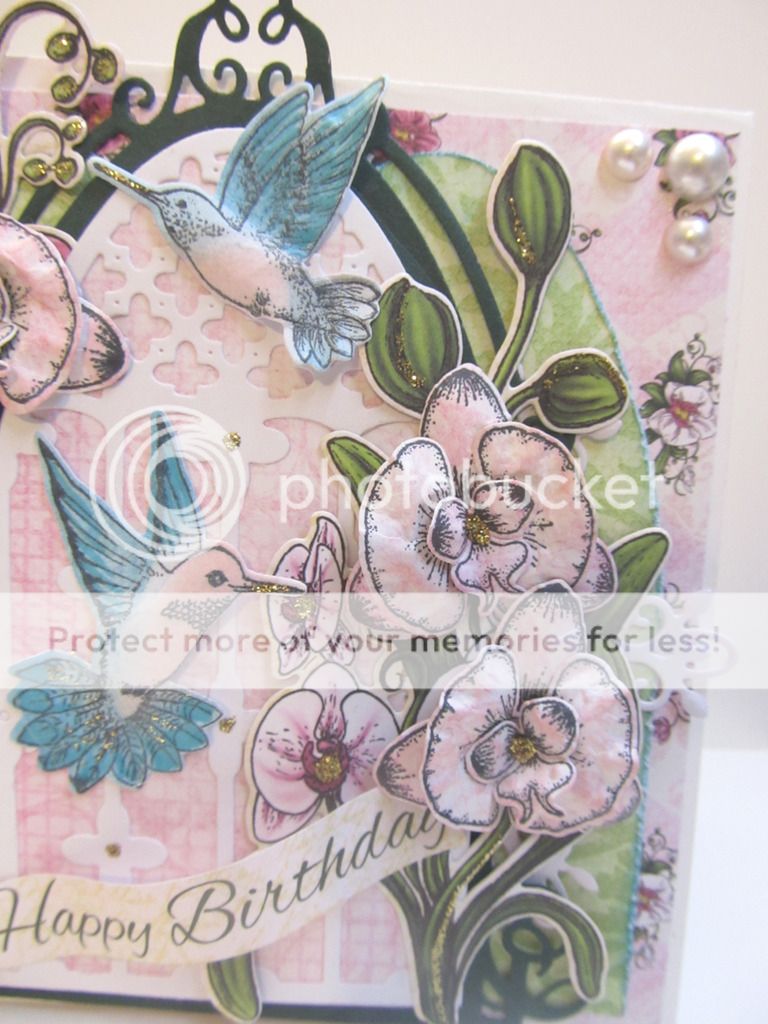
I used the cute humming birds and flowers for this card, plus the window dies... what ya' think?
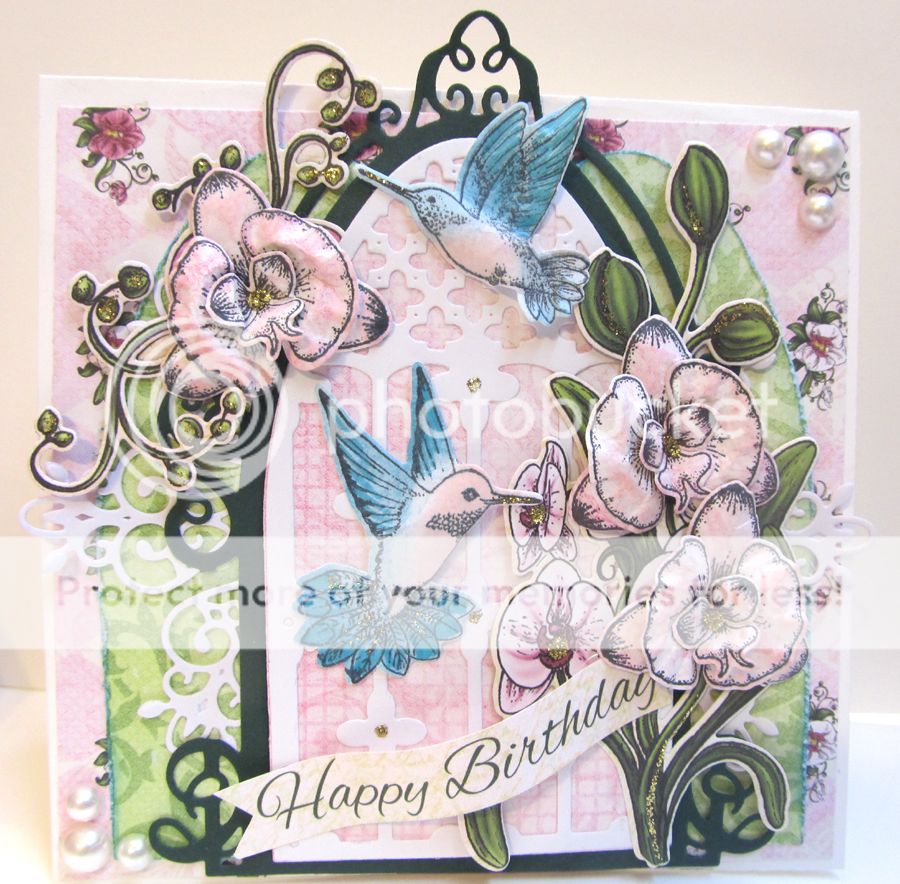
 *The paper collection it self has pre-printed images you can use your dies on. From this one sheet and using the Regal Hummingbird Die I die cut the cut flower arrangement you see on the upper left corner of my card and using the Botanic Orchid Bouquet Die cut the beautiful bouquet image you see on the lower right hand corner of the card. Onto these images adhere the flowers you made earlier. Arrange them in a way that they looks like they are part of the die cut.
thanks so much for stopping... and as always...

I've liked all the papers thus far, but I ADORE these, they are pink and soft and so easy to create with.
I used the cute humming birds and flowers for this card, plus the window dies... what ya' think?
Products Used:
HCD1-7013 Botanic Orchid Bouquet Die
HCD1-7100 Botanic Window Die
HCD1-7101 Botanic Orchid Die
HCD1-7102 Regal Hummingbird Die1
HCPC-3741 Botanic Orchid Cling Stamp Set
HCPC-3742 Regal Hummingbird Cling Stamp Set
HCD1-747 Arianna Lace Die
Botanic Orchaid paper Collection
Other materials used: Hunter green card stock to die cut the large window frame, white card stock for the card base, Tim Holtz Distress Ink in Broken Chain and Spun Sugar to color in the humming birds and shade the flower petals, 6 flat back pearls, and Stickles in Gold and Diamond.
Like always, I start by making my card base, this case I used a piece of 5x10 white card stock folded it in half. This makes your card base 5x5.
*From the Botanical paper Collection I cut a piece 4 3/4 x 4 3/4 and layer this on the card base.
*Using the Window die, use the Arch die to cut 3 pieces,(This is the thiniest of the dies, it will cut an solid piece in an arch shape.) I cut 2 in green and 1 in pink.
*Again, using the Window die, out of the Hunter green card stock, die cut the window frame. (This will be the bigger of the dies, with all the pretty scroll work)
*Finally from the Window die, cut the center piece from the white card stock.
**Set all these aside.
*Stamp the humming birds, and 3 sets of orchids (I used the samllest of the 3 stamps), color them using the above Tim Holtz given colors and die cut them. Shape your 3 flowers and put them together. Also, while you're utting, cut one of the lacy dies from the Arianna die set and cut it half.
** Set this aside as well.
*The paper collection it self has pre-printed images you can use your dies on. From this one sheet and using the Regal Hummingbird Die I die cut the cut flower arrangement you see on the upper left corner of my card and using the Botanic Orchid Bouquet Die cut the beautiful bouquet image you see on the lower right hand corner of the card. Onto these images adhere the flowers you made earlier. Arrange them in a way that they looks like they are part of the die cut.
* Back to the card, now over the 1st layer of designer paper you added to the card base, adhere the 2 green arches so they are side by side, but stay within the size for the card. Over these, center the pink arch, but use foam tape to give this 3rd piece some dimension. On either side of this layer tuck a piece of the Arianna Lace you had cut before. Over all this, now adhere the Window die cut over the pink arch and adhere the White arch ontop of the pink arch. This gives you a completed window.
* now arrange your flower bouquet you on both sides of the windows, place the cute humming birds playfully around the flowers.
*The paper collection also comes with a sheet that has many pre printed sentiments. I cut a piece that read HAPPY BIRTHDAY. Cut it to look like a banner and attached it to the front of the card just below one of the humming birds.
*This time I used Gold stickles for the humming birds tails and beaks plus on some of the flowers. For the pictures, I did not add the stickles to the flowers, mainly because it does not photograph well, but this is a pretty sparkly card. So use stickles are your own judgement. On the top right corners and lower left corner I finished the card by adding 3 flat back pearls.
That is is... you're done... have fun creating!
thanks so much for stopping... and as always...
Elsa, you've created such a pretty window scene here with those gorgeous orchids and hummers! So lovely!
ReplyDeleteBeautiful card! I love the colors you chose to play with. Awesome!
ReplyDeleteBeautiful , Beautiful......Just Beautiful. Loved it to d core.
ReplyDeletelove all the hummingbirds and gorgeous orchids.
ReplyDeleteWow, just beautiful. I would love to see a video on this. You are so very talented, love all your videos, easy to follow too. Thank you for sharing with us.
ReplyDeleteSo pretty and soft! Hugs, Marie
ReplyDeleteThese birds are popping off the page with their delightful blue wings...love this card! Hugs
ReplyDeleteVery pretty! I love how you placed every thing.
ReplyDeleteYvette
Super pretty! I love your hummers and those lovely orchids!
ReplyDeleteThis is so beautiful.....So Gorgeous!!
ReplyDeletebeautiful card, love all the die work Elsa.
ReplyDelete