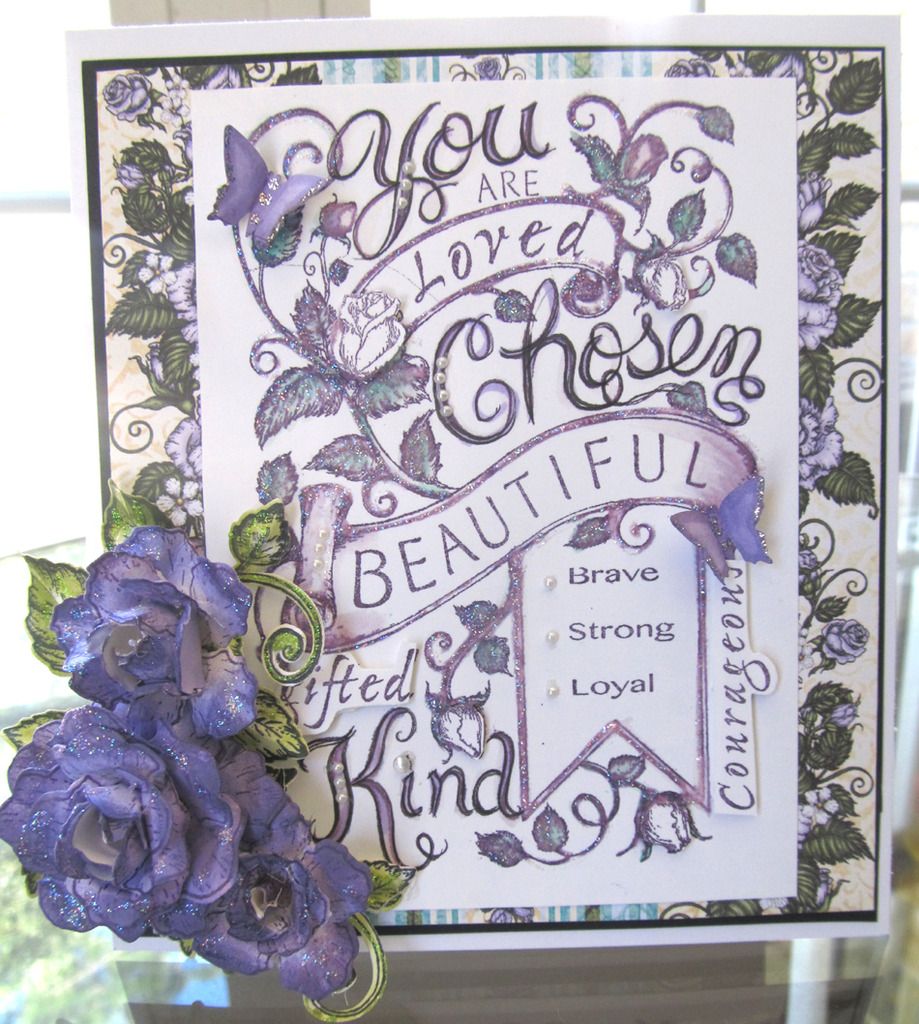
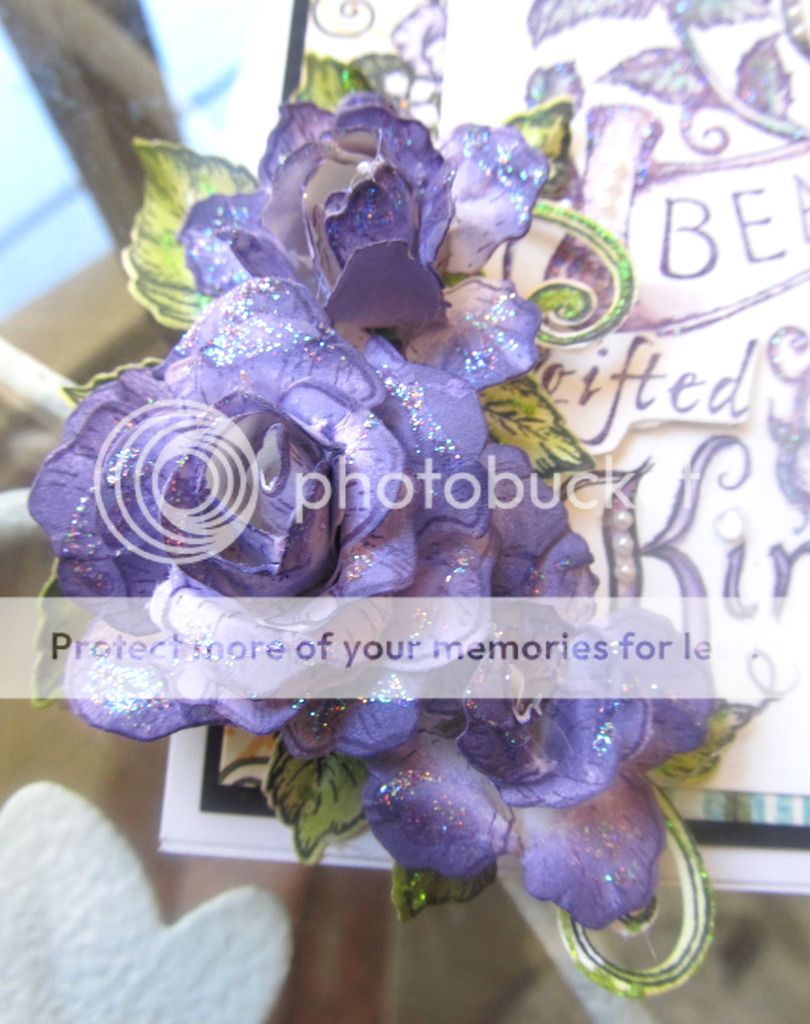
Hi!!! So today I have a purple rose card... The background is a huge stamp HFC put out this month with the October release and I love it!! The flowers are hand made, using the stamp and dies from the Blushing Rose collection, you can click on the following link https://youtu.be/Z8P070kC3oo
to learn how to create dimensional roses with this collection.
But not only did we get to create with the HFC awesome stamps and dies, we also had a few chipboard pieces from Creative Embellishments!
here is this weeks card....
Products Used:
HCPC - 3757 Blushing Rose Background Cling Stamp
HCPC - 3752 Classic Rose Cling Stamp
HCD1 - 7110 Classic Rose Die
HCPC - 3546 Classic Leaf Cling Stamp
HCD1 - 736 Classic Leaf Die
Heartfelt Designre paper, "Blushing Rose" collection
other products use: StampingUp! stamp pad "Eggplant Envy", Tim Holtz "Peeled Paint" distress ink pad, mini flat back pearls, black and white cardstock, foam tape, Stickles "Diamond Dust"
.
Card base 6.25 x 5.25
Stamp the Blushing Rose Background and cut it down to 5.5 x 4
From the designer paper cut 5 x 5.75
From Black card stock cut 5.25 x 6
Stamp the background onto the white card stock and color it in with the stamp pad inks mentioned above. I did more of a wash, using a small round water color brush.
Stamp the second background image on a separate sheet of paper and fussy cut around the words "gift", "courage" and most of the rose buds. These you will adhere to the first background stamped using the foam tape to make your images pop from the card.
Layer this colored in panel onto the designer paper using foam tape, this will make the whole thing pop. Adhere these two layers to the black panel and finally onto the card base.
Adhere some of the flat back pearls onto part of the stamped image, I added them to the words and to the 3 bullet images on the banner.

I did not want to cover up too much of the background image so I adhere my flowers to the bottom left hand side of the card.
Stickle it all to make it look sparkly and your're done.
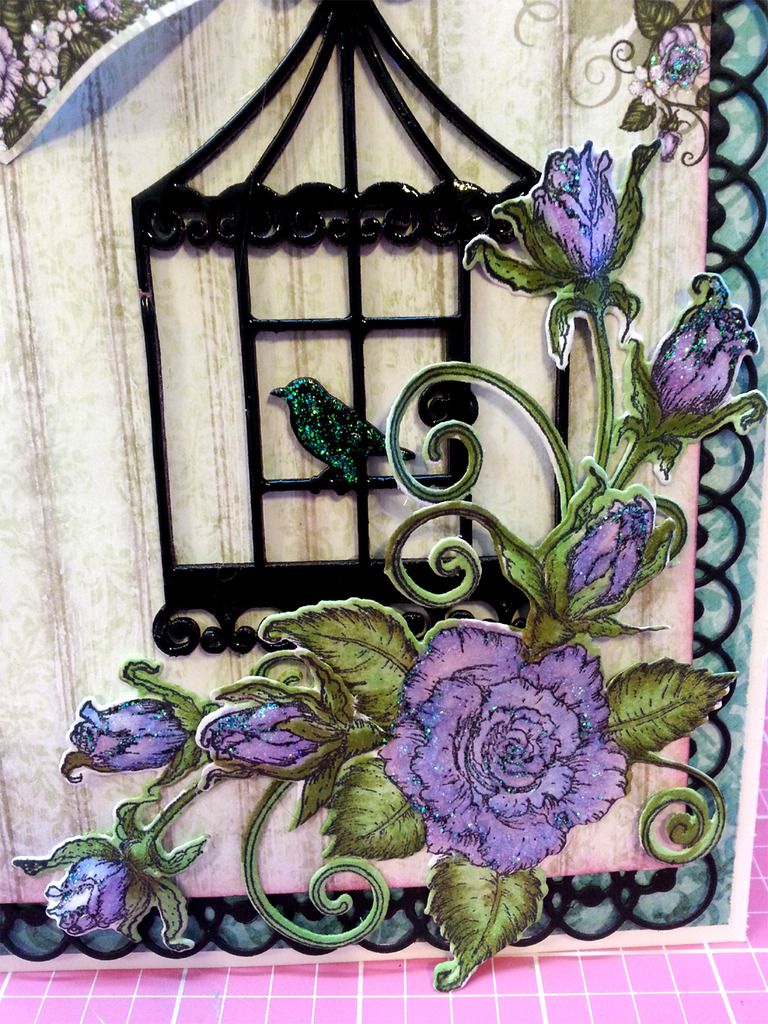
NOW...these from the past 2 weeks have those awesome Creative Embellishment chipboard pieces.
here are peaks...scroll down for more details...
Awesome Butterfly...
here are peaks...scroll down for more details...
Awesome Butterfly...

Check their site here...
The items are clean cut and
really easy to work with...
And here is the black bird Cage...that was heat embossed with black embossing powders.
 On the right hand panel of my blog here, is a list of all the ladies in the Heartfelt Design team,
visit them for more inspiration and more from Creative Embellishments.
Thank you for visiting and for your support...
and as always...

This is beautiful! Your roses are amazing!
ReplyDeleteAbsolutely gorgeous!
ReplyDeleteGorgeous!!
ReplyDelete